Are you also experiencing the error message “Phone Number shared via URL is invalid” in Whatsapp Web? Rocketsend.io is here to help.
In this guide article, we will be showing you a workaround whenever you are encountering this issue in WhatsApp.
Before continuing, check this first.
Before proceeding with this method to get it working, it is important to make sure of the following:
- Confirm that you have typed the phone number correctly and included the country code.
- Verify that the phone number has a WhatsApp account. If it does not have a WhatsApp account, this error may still occur.
Please ensure these checks are completed before continuing with the method provided. 'Phone Number Shared Via URL Is Invalid' error message can also be given for invalid messages, that is why we request you to check this.
Also, please note that there error messages are different in different languages:
Portugese - Brazil: 'O número de telefone compartilhado através de url é inválido.'
Spanish: 'El número de teléfono compartido a través de la dirección URL es inválido'
Indonesian: 'Nomor telepon yang dibagikan melalui URL tidak valid'
Main method: Workaround Through Google Contacts
If you already validated that the number is in correct format and is registered in WhatsApp but the issue is still persisting, here is the workaround with rocketsend.io. This will work for the 'Phone Number Shared Via URL Is Invalid' issue.
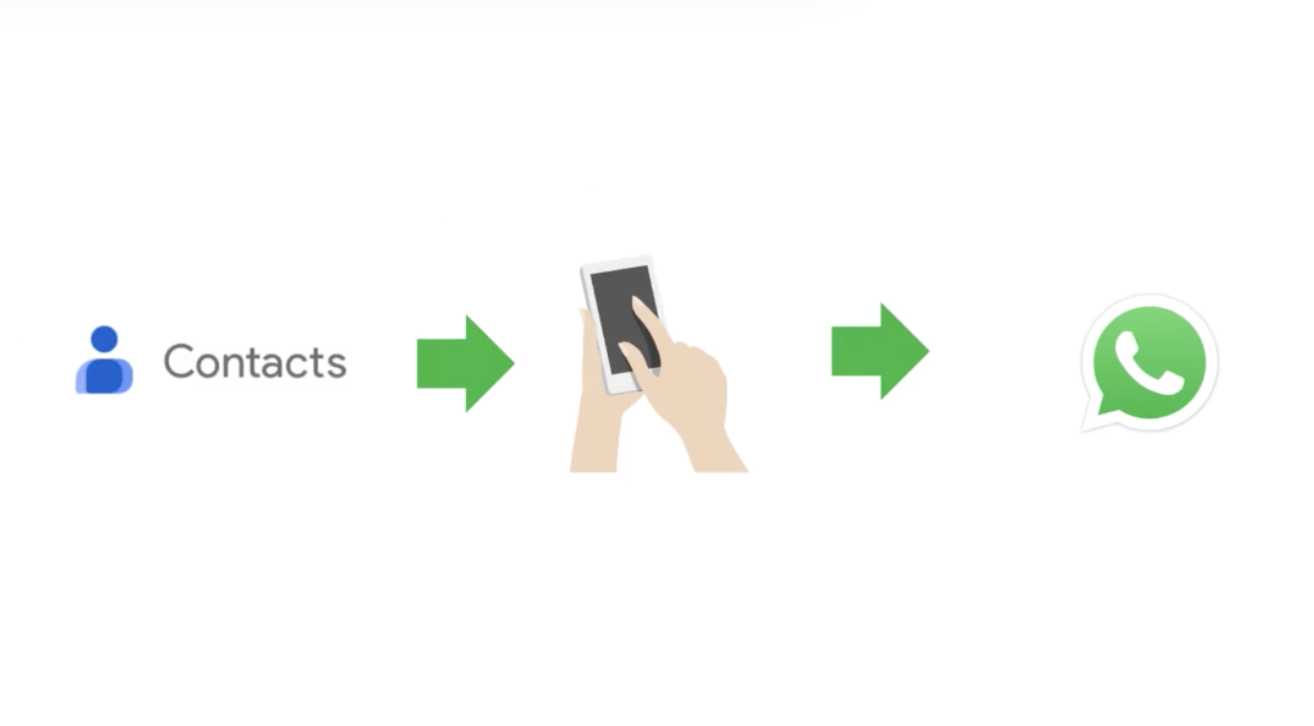
This issue happens because WhatsApp is not allowing you to send messages to people who are not in your contact list.
This solution works by uploading your contact list to Google Contacts that will then be synced to WhatsApp. When you do this the contacts you want to send WhatsApp to will have been added to your contact, this is why it works. Please see details below.
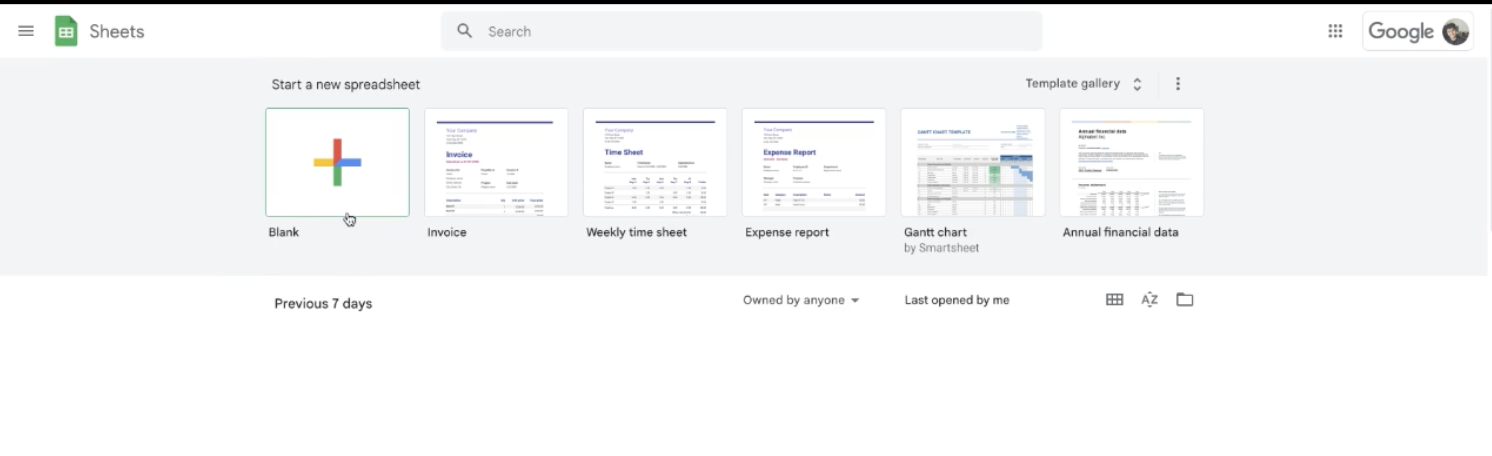
Step #1: Create contact list in CSV format
Create a CSV file with all your contacts with their names and phone numbers in it. With this step, you can either use Microsoft Excel or Google Sheets. But for this particular example, we are going to use Google Sheets.
First, go to sheets.google.com, and create a blank spreadsheet
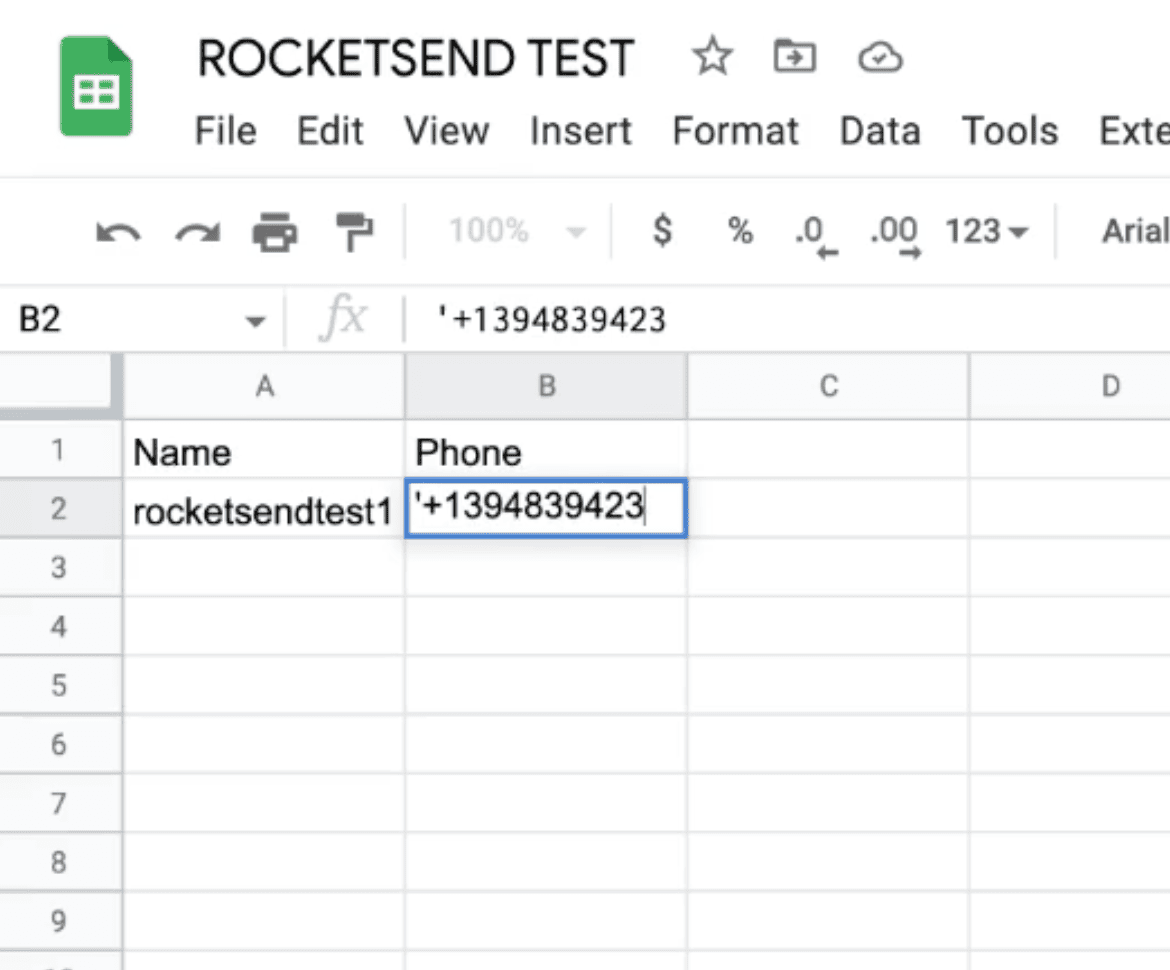
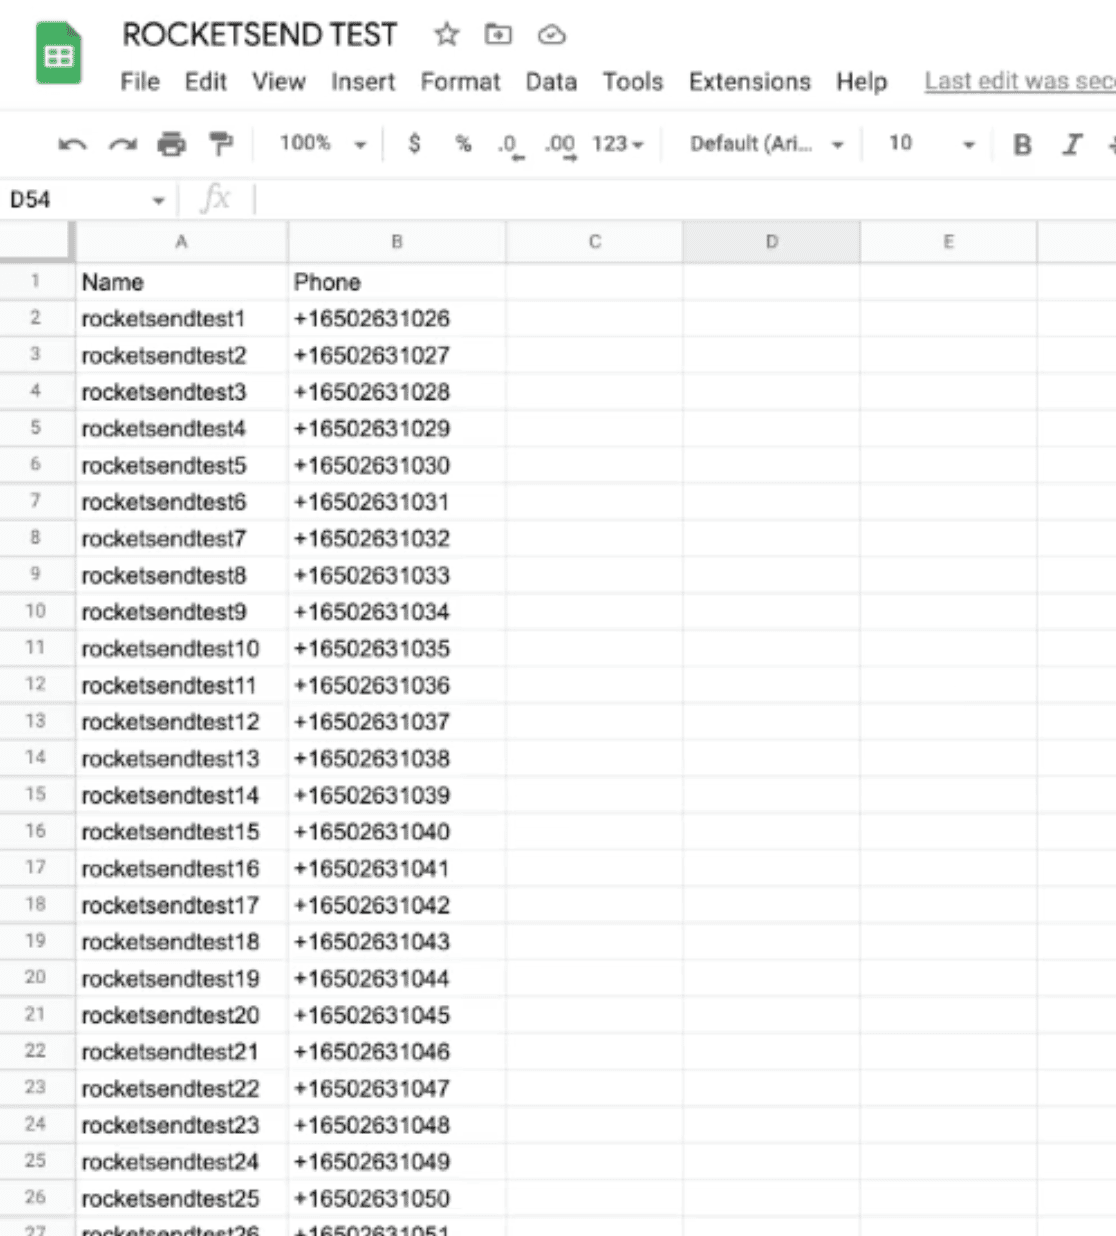
Create the columns “Name” and “Phone” as also shown on the image below. Make sure that the column name is exactly 'Name' and 'Phone'. This is important.
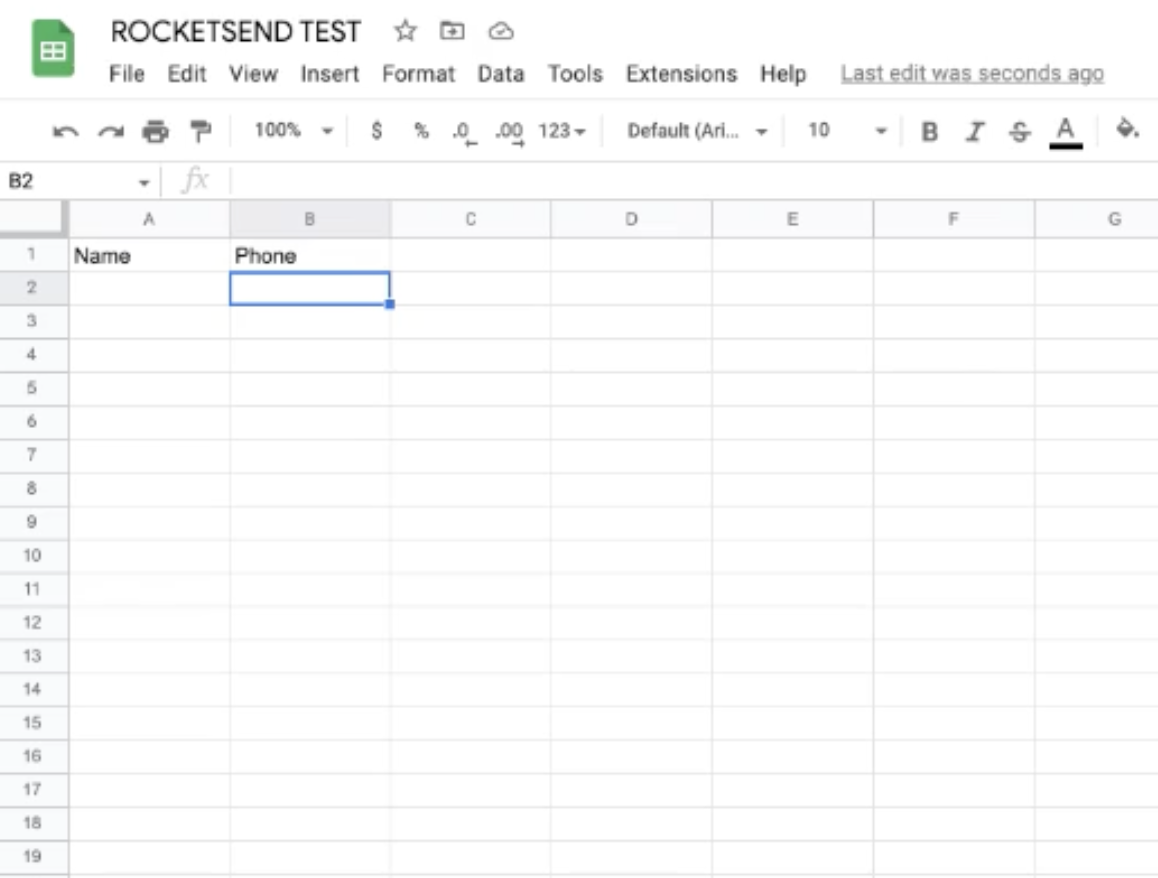
Key in your contact list. Make sure that the area code is properly encoded by putting a + in front of the number. Sometime when you are having trouble added ing the play, add a single quote (‘) at the beginning of the number.
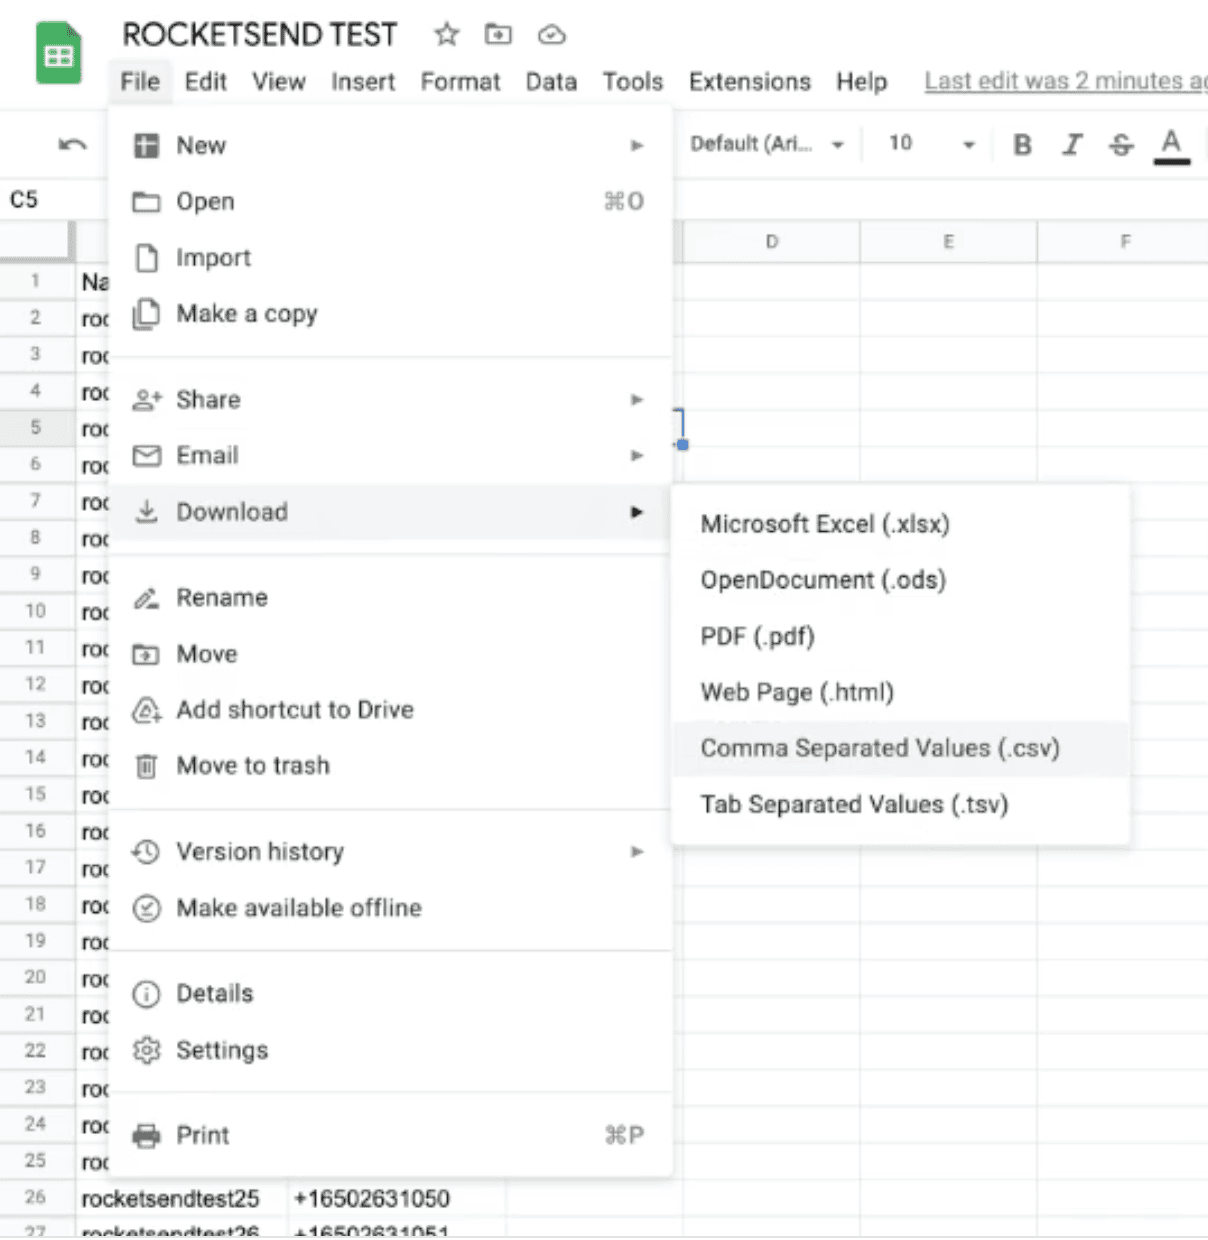
After creating the whole list, save the file in CSV format. Go to File > Download > Comma Separated Values (.csv). This will download the number as CSV.
Step #2: Upload The Contact List In Google Contacts
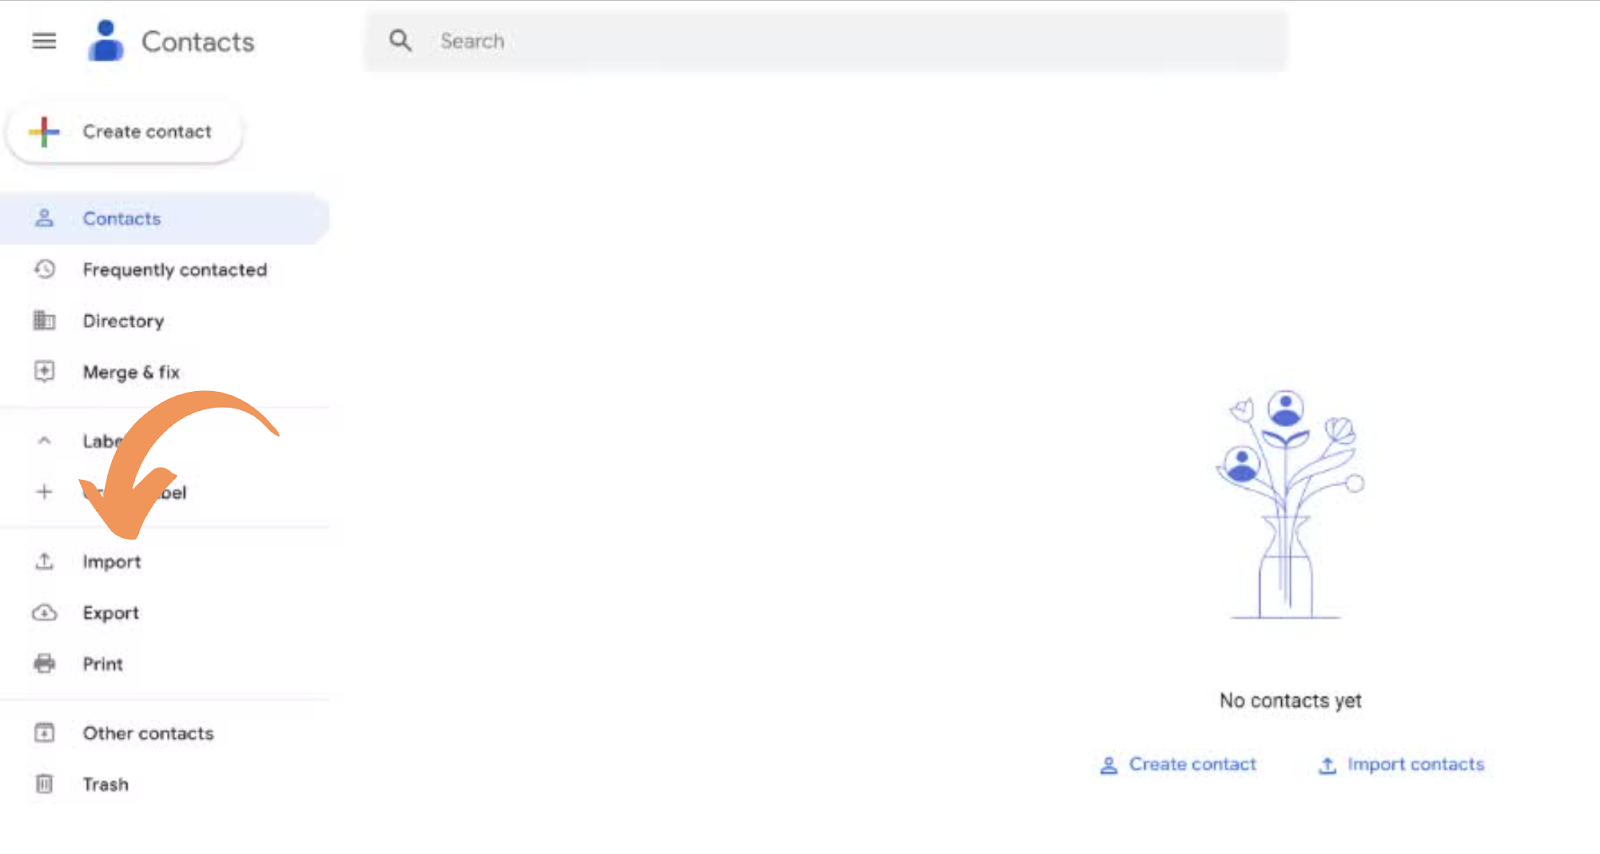
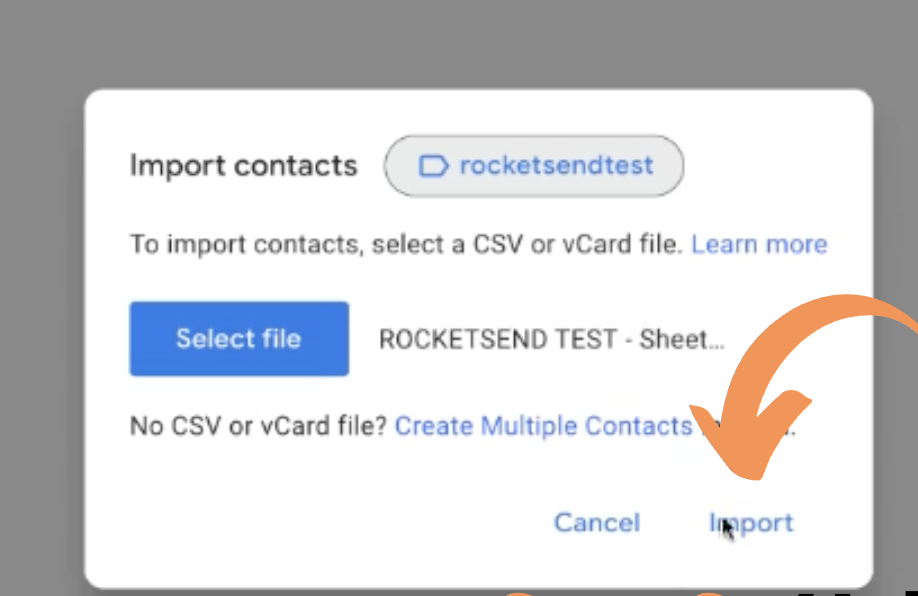
After downloading the contact list in CSV format, it is now time for us to upload the file in Google Contacts. Head to contacts.google.com and click the Import button on the left hand side of the page.
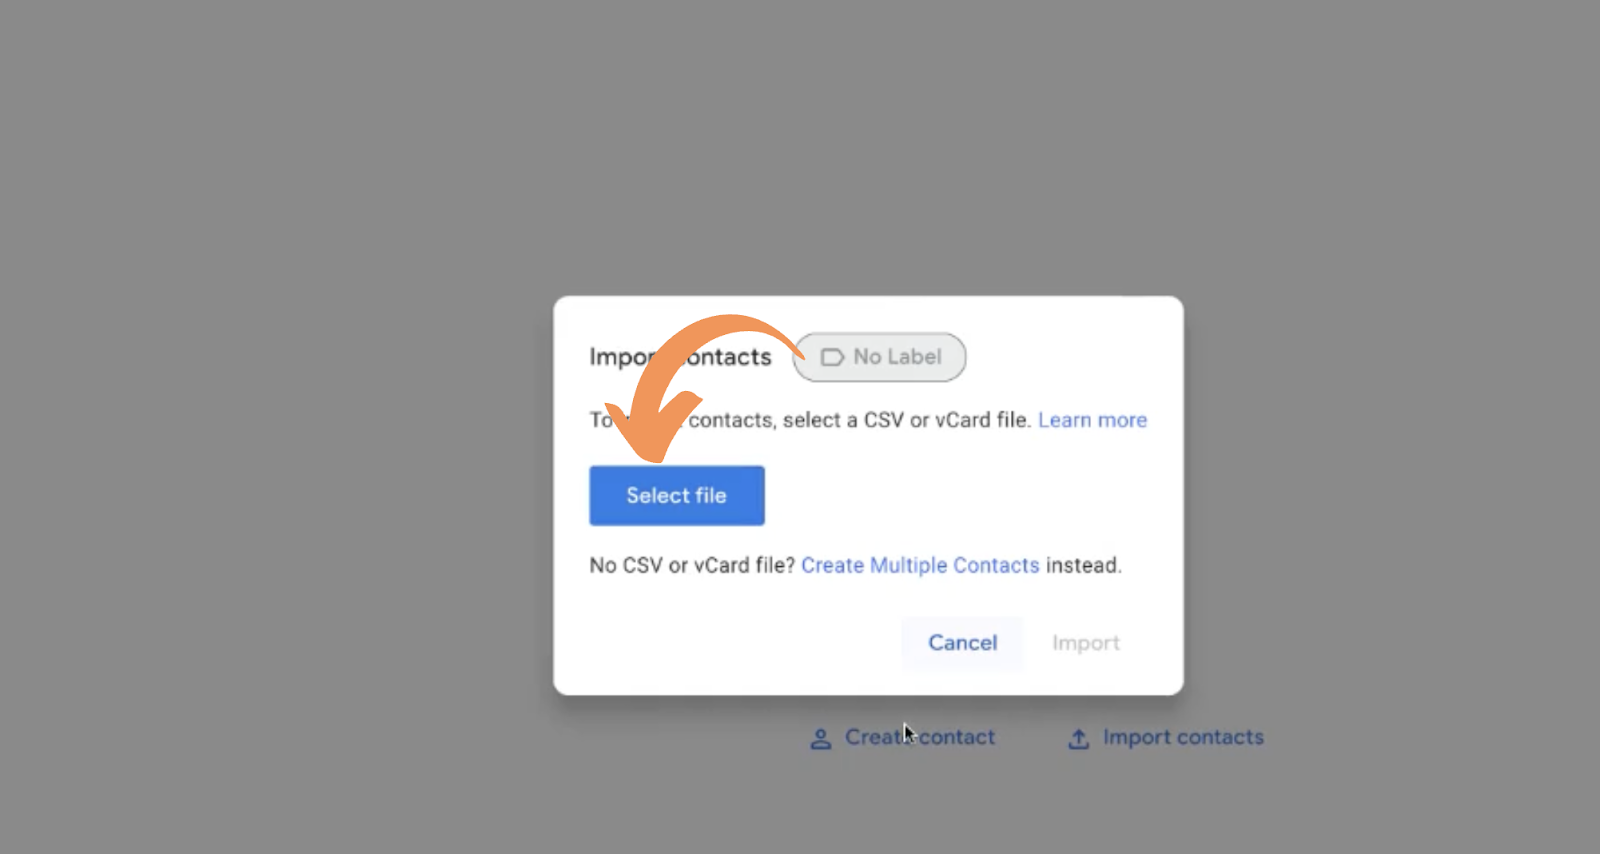
Select the file we’ve downloaded earlier by clicking the Select file button on the pop-up window.
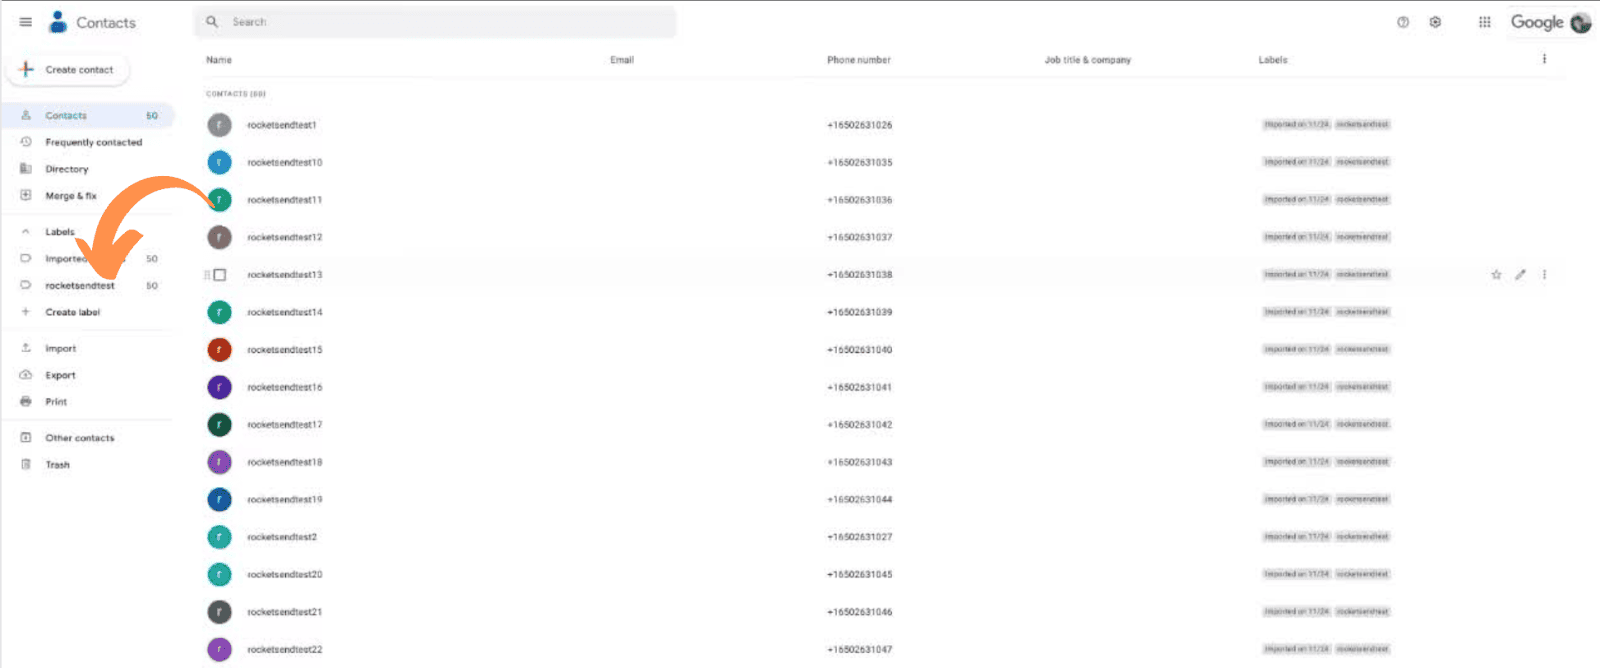
For better management, create the label to name the whole contact list. This will give way to delete the contacts faster later if we are planning not to save these permanently later.

After all has been set, click the Import button.
Note that you can just upload all your contacts in one go (a week worth or all your contact records) to save you time in doing the workaround. You don’t have to re-upload contact lists every time.
Step #3: Check The Contacts Sync
Next, we will be checking if the contact records are properly being synced from Google Contacts to WhatsApp.
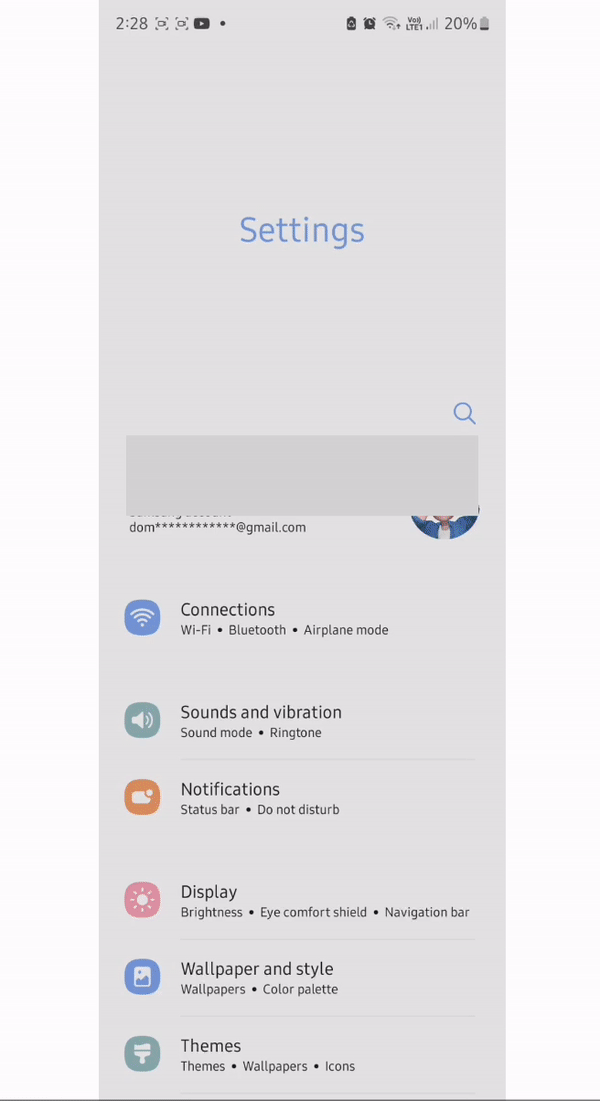
For Android:To check if Google Contacts is properly syncing, go to Settings > Search for “Accounts” > Tap on Manage Accounts and check the Google account where we uploaded the contact list earlier.
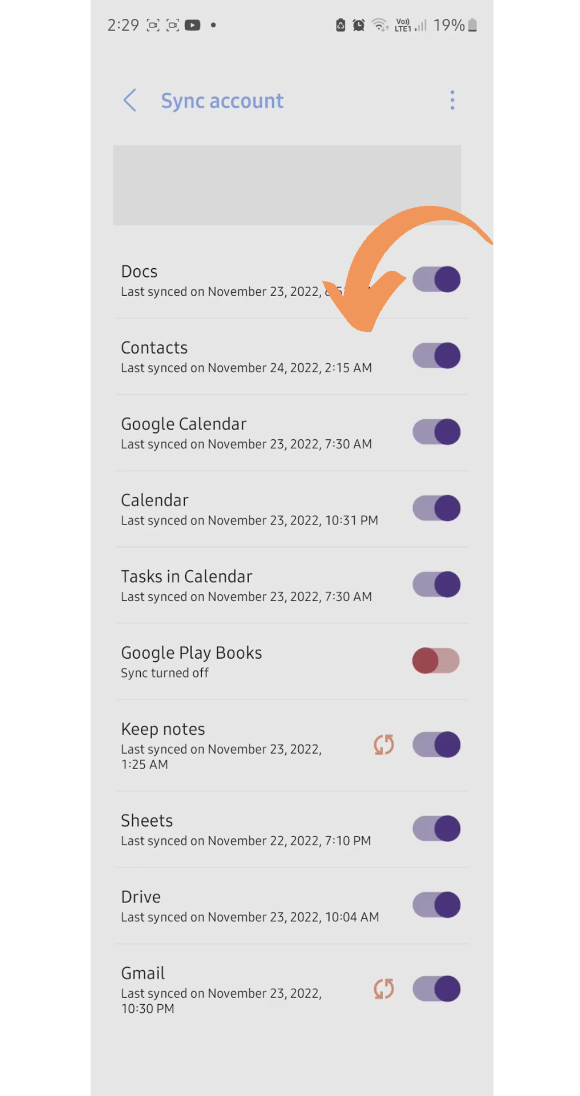
The time synced should be updated. If in any case that it is not, you can turn off and on the toggle button for Contacts.
Furthermore, to check if WhatsApp has access to contacts, you can go to Settings > Search for “WhatsApp” > Tap Permissions > and check if the contact is in the “Allowed” section. If it is not, you can tap the radio button “Allow”.
To check contacts syncing in iOS, you can open Settings > search for Contacts > Tap Accounts > and check the syncing for the Google account is enabled. The Contacts toggle button should be enabled.
Then, to check the permissions of WhatsApp, open Settings > search for WhatsApp > and check the section “Allow WhatsApp To Access”. Make sure that the Contacts toggle button is enabled.
To verify if the contact is already synced, you can search the contact in WhatsApp Web. Head to web.whatsapp.com, click the New Message button, and search for the contact you have uploaded earlier.
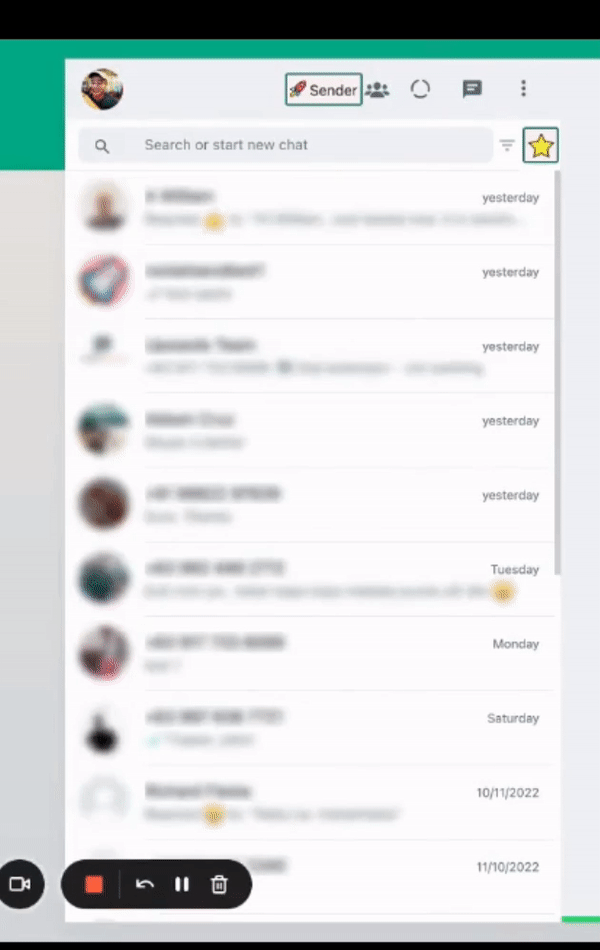
Note that only WhatsApp-registered mobile numbers will appear here. In this case, since we uploaded a list of dummy numbers, there are only 2 registered mobile numbers that appeared.
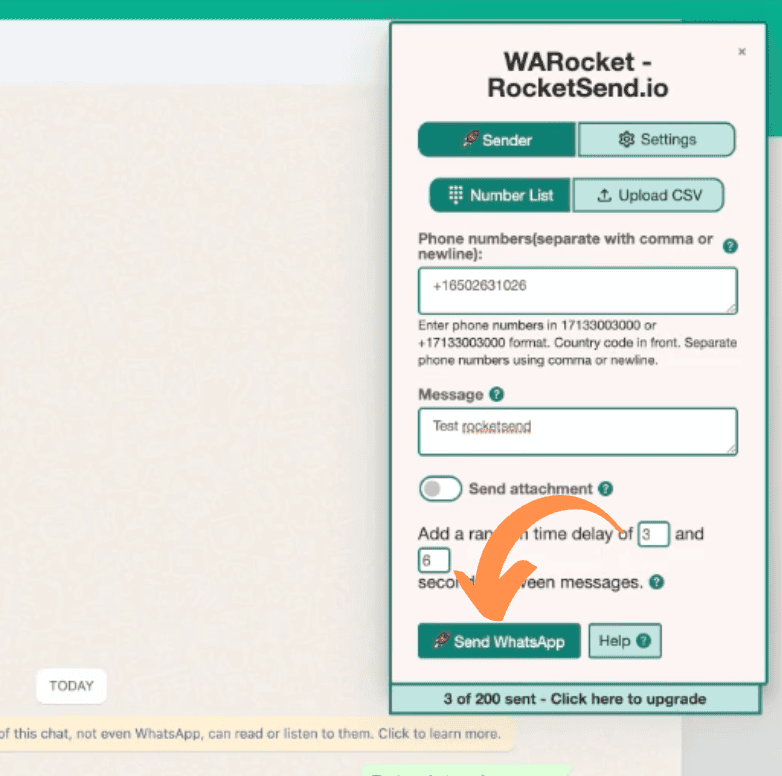
Step #4: Send The Message Using rocketsend.io Chrome Extension
Now all is set, we can now go send our message and use rocketsend.io as usual.
If you already don't have the tool, you can install it for free at rocketsend.io.
Go to web.whatsapp.com, click the Sender button, and the rocketsend.io Chrome extension will appear on the right hand side of the page.
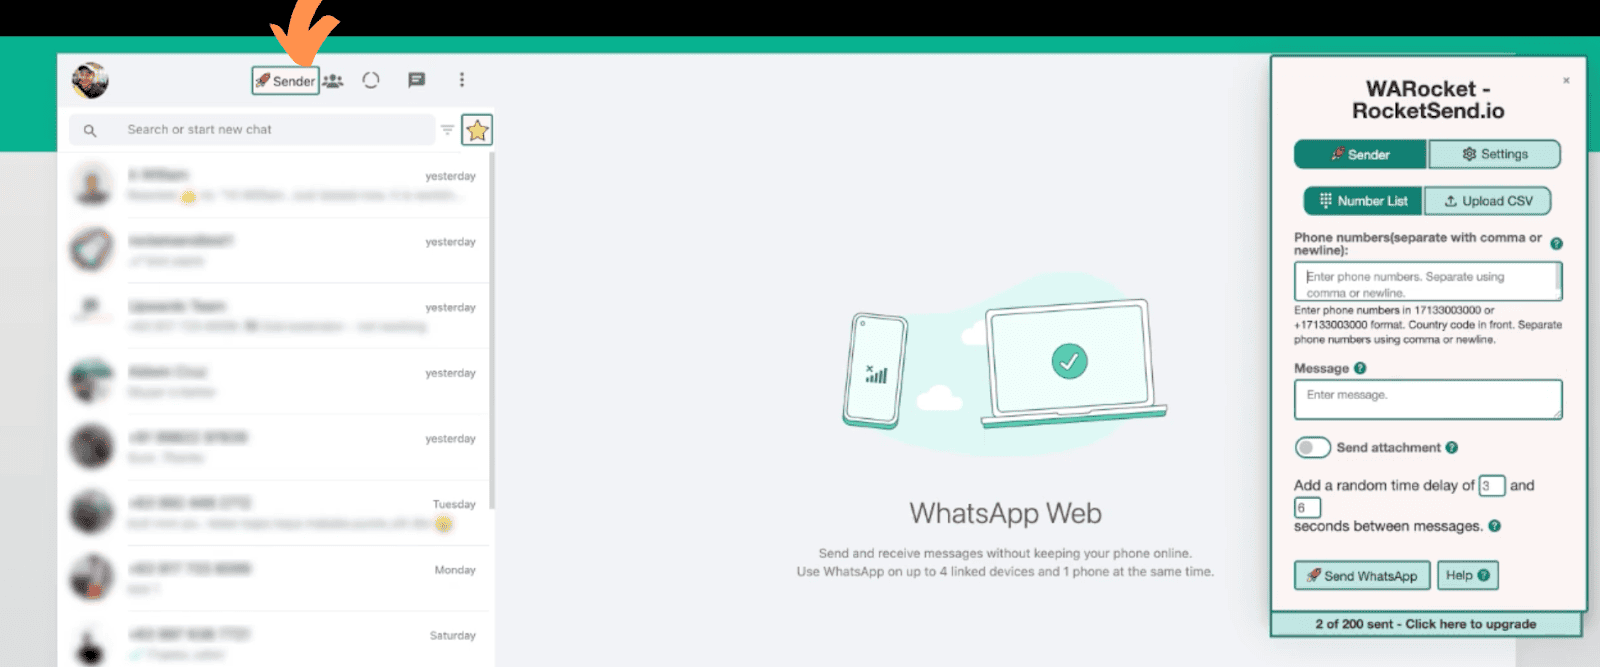
You can key in the number in the Phone Numbers field, and add the message that you want to send in the Message field.
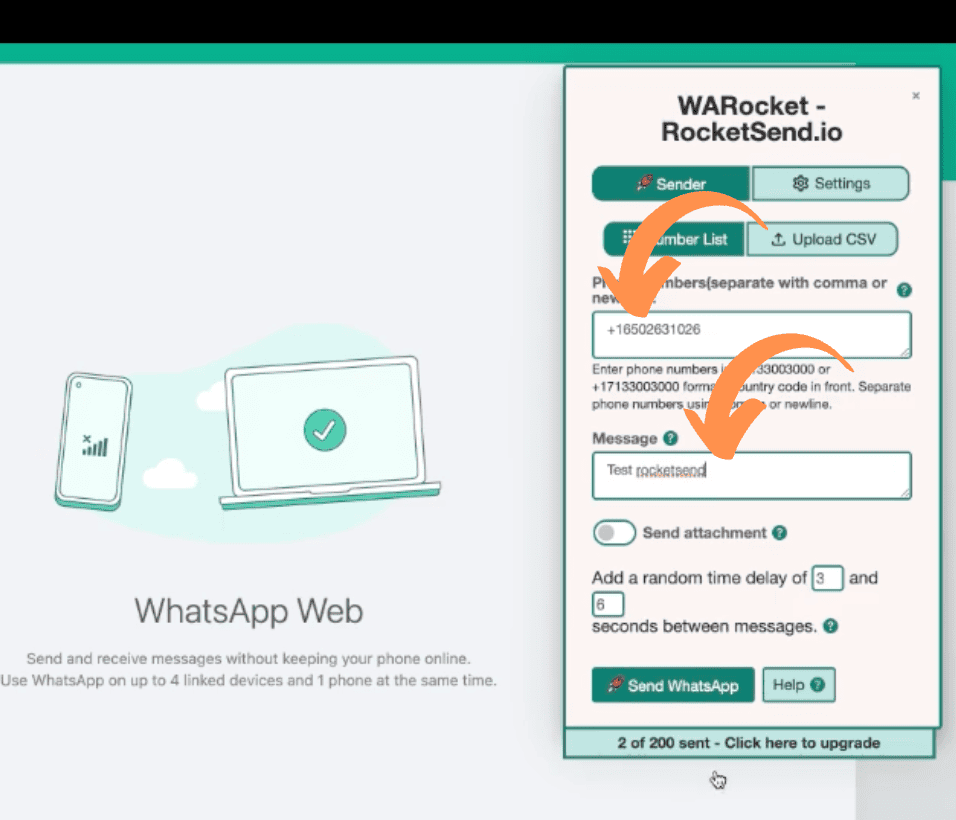
When done, click the Send WhatsApp button.
Optional Step: Delete The Contact List
If you are not planning to save the contact list permanently, you can easily delete the created records by going again to contacts.google.com. Check the created label that was created earlier.
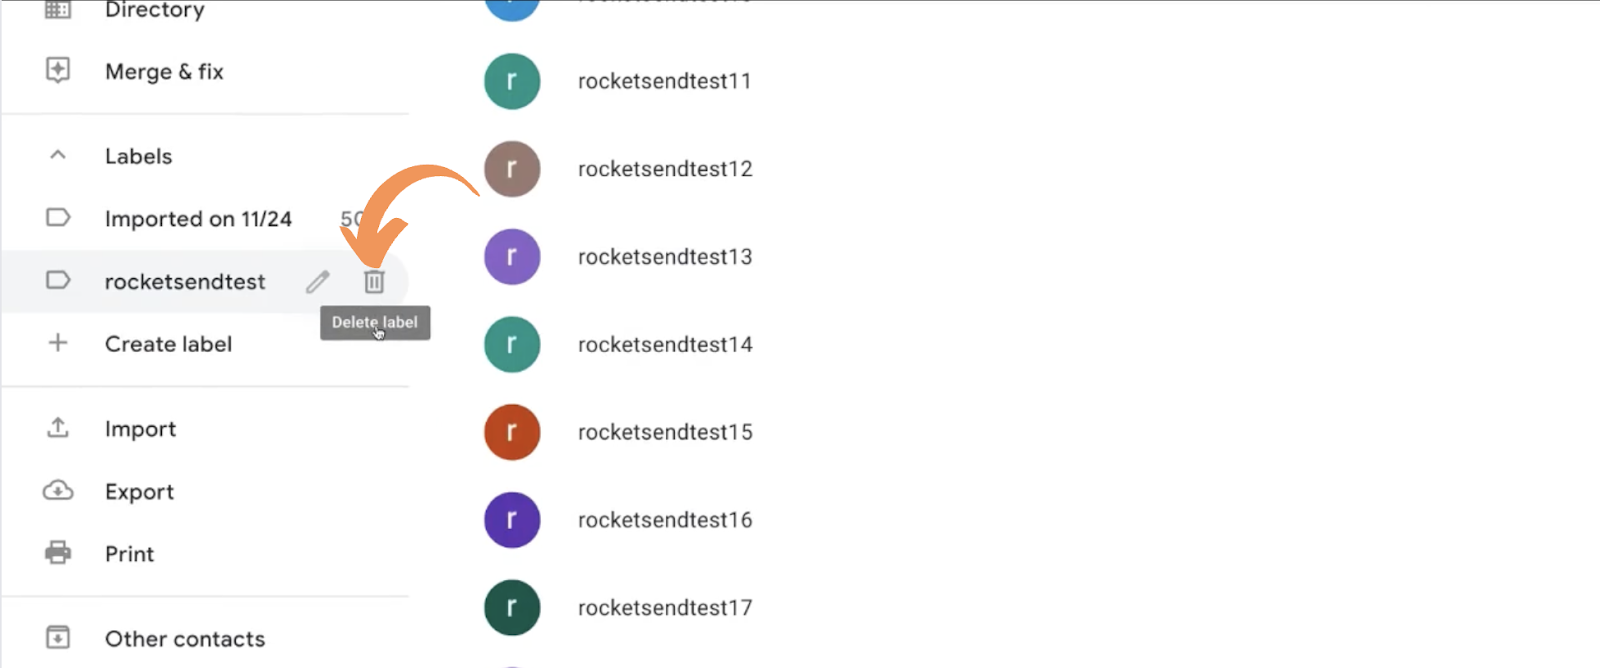
Click the Trash icon to delete all the contacts associated with the label and list created.
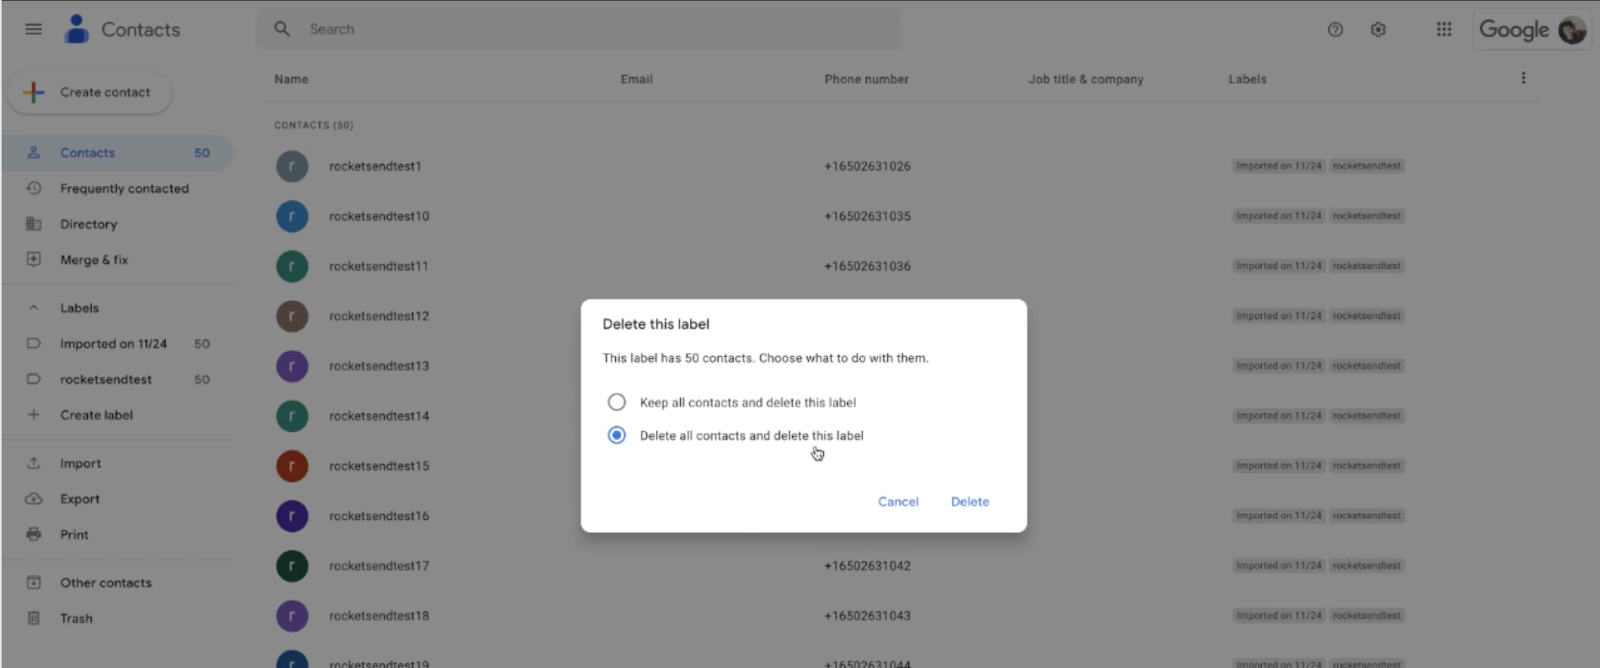
You’ll have the option to just delete the label, or delete the whole list. Click the option “Delete all contacts and delete this label” to delete the records, and finally, the Delete button on the pop-up window.
And that’s it! That is how you do the workaround whenever you are encountering the “Phone Number Shared via URL Invalid” issue in WhatsApp Web.
For more information, feel free to talk to us via the Help button in rocketsend.io pane.